Saturday, March 31, 2012
Teaching Schedule update
On April 9 I am teaching Hand Cut Dovetails from 4:00 to 7:00. If you are taking this class leave a comment or email me and I'll give you access to the online version of the class reference document.
On April 19 I am teaching Sharpening 101 from 4:00 to 7:00. I teach two sharpening classes at Woodcraft. In Sharpening For The Woodworker I teach chisels, gouges, plane irons, scrapers and sometimes handsaws. In Sharpening 101 I teach chisels, gouges and kitchen tools. In both I teach the science behind sharpening, answer any questions and demonstrate sharpening anything a student brings. Attendees should bring a couple of things to sharpen and any sharpening equipment they have (nothing electrical).
My "Becoming a Hand Tool Woodworker" class continues April 14, 15, 21, 22.
In the next session of Hand Tools we start out by carving a spatula. From this exercise we will learn about working in cooperation with the wood fibers. After the spoon we will continue from where we left off by dimensioning our aprons, dimensioning our legs and then sawing them out, rails and drawer guides. We will saw out but not dimension the drawer parts. Our goal is to complete all the dimensioning and start doing joinery.
Thursday, March 29, 2012
First night of class
Just before everyone arrived. I have, with lots of help from Trent, milled the MDF that we will use to make shooting boards, milled poplar for bench hooks and cut the 6/4 cherry into leg length 6" wide chunks.

After building our bench hooks. We laid out our aprons and table tops on rough cherry boards with chalk or heavy pencil. Then the sawing begins. I taught everyone to saw and they begin by making all of their cross cuts. Jackie, despite never using a handsaw before, did every cut straight and square. Clearly the instruction was amazing or maybe Jackie is a natural.


Zach is cutting out his table top.


Everyone had a sweaty fun time using our cookie-powered tools, and the cookies were delicious.
Next session we will dimension our boards with hand planes and the shooting boards that we all built.
Bill
Monday, March 26, 2012
Thursday, March 22, 2012
Counting Down
On March 28 I am teaching a course in hand tool woodworking. It's a beginner's course where you will dimension and square lumber completely by hand, cut mortise and tenon joints, cut half-blind and through dovetails by hand, fit a drawer, french polish and in the end have a side table with a drawer very much in the style of the Shakers. You will have practiced all of the skills necessary to build furniture completely by hand.There is one spot left open in the class as of yesterday.
Becoming a Hand Tool Woodworker: Build a Side Table
It’s about building stuff. It’s not about dovetails or mortise and tenon joints. It’s about building things with your hands. It’s about honing skills and learning old ways of doing things. It’s about getting sweaty and making functional pieces of art.
Come learn with me about woodworking in a shop where you can listen to soft music and talk with your family or friends while dimensioning lumber. Come and experience the joy of using tools that don’t require hearing protection and don’t have safety warning stickers attached.
Together we will each build a side table in the style of the Shakers. The class will teach you to turn rough sawn lumber into furniture without plugging anything into the wall. Learn to work wood the way your grandfather did, with handsaws, planes and chisels.
For $550.00, which includes the lumber, you can learn and build a Shaker side table with a dovetailed drawer.
Prerequisites for this class:
What to bring to the first session, don’t buy anything just bring what you have:
Contact Woodcraft of Grand Rapids at 616-957-9663
Becoming a Hand Tool Woodworker: Build a Side Table
It’s about building stuff. It’s not about dovetails or mortise and tenon joints. It’s about building things with your hands. It’s about honing skills and learning old ways of doing things. It’s about getting sweaty and making functional pieces of art.
Come learn with me about woodworking in a shop where you can listen to soft music and talk with your family or friends while dimensioning lumber. Come and experience the joy of using tools that don’t require hearing protection and don’t have safety warning stickers attached.
Together we will each build a side table in the style of the Shakers. The class will teach you to turn rough sawn lumber into furniture without plugging anything into the wall. Learn to work wood the way your grandfather did, with handsaws, planes and chisels.
For $550.00, which includes the lumber, you can learn and build a Shaker side table with a dovetailed drawer.
Prerequisites for this class:
- Be excited about building furniture
- Either own or be prepared to own the kit of tools (I suggest that you not purchase new tools prior to the first session)
- Not be afraid to sweat and get out a little of breath now and then
- Be ready to have fun and learn
What to bring to the first session, don’t buy anything just bring what you have:
- Notebook
- Pen
- Chalk or Carpenter’s pencil
- ½” Bench Chisel
- Combo square
- Rip Saw
- Crosscut Saw
- An empty box for transporting your lumber
- Wire brush
- A water container with a top, sips at the fountain will not be sufficient but spills are a disaster. Bring this to every session. It might be wise to pack a snack in there too, you are going to work.
Contact Woodcraft of Grand Rapids at 616-957-9663
Thursday, March 8, 2012
Logistics
It seems odd to me. The time I've spent writing in preparation for the "Becoming a Hand Tool Woodworker: Build a Shaker Side Table" class. I thought I'd spend a little bit of time writing and a bunch of time building side tables. I thought, at first, that I'd build three or four tables. I would only complete one prior to the class but I'd have all the steps -I call them tasks in the document- completed and set aside. Then the logistics of that hit me. If I have a leg, an apron, a leg with a mortise, an apron with a tenon, a leg with a mortise and chamfered, and an apron with a tenon and a bead, and a leg with a mortise and a chamfer and two tapered sides and a top and a top with a bevel and a top with a bevel and the edges rounded over and a...and a...and a...
I have a couple of tables nearing completion. One is clear Northern White Pine and the other is Cherry. The Cherry will go to Woodcraft to help advertise the class. Someone has already claimed right of first refusal on the Pine. During the class I will probably build at least one, maybe as many as three more. I'm keeping one, I suspect Woodcraft will want to keep the advertising piece.
But the writing has been the real surprise. The document starts out with:
Students for this class should:
I don't care what you say, It's not easy to spend money for other people.
I finally -I hope- settled on one list, "The Tools I Used To Build The Table." I will lay them all out on the bench the first night, explain what they are, how they are used, how to maintain them and how to do their job another way.
And the students can spend their money themselves.
I have a couple of tables nearing completion. One is clear Northern White Pine and the other is Cherry. The Cherry will go to Woodcraft to help advertise the class. Someone has already claimed right of first refusal on the Pine. During the class I will probably build at least one, maybe as many as three more. I'm keeping one, I suspect Woodcraft will want to keep the advertising piece.
But the writing has been the real surprise. The document starts out with:
Students for this class should:
- be excited about building furniture
- either own or be prepared to own the kit of tools (I suggest that you not purchase new tools prior to the first session)
- not be afraid to sweat and get out a little of breath now and then
- be ready to have fun and learn
I don't care what you say, It's not easy to spend money for other people.
I finally -I hope- settled on one list, "The Tools I Used To Build The Table." I will lay them all out on the bench the first night, explain what they are, how they are used, how to maintain them and how to do their job another way.
And the students can spend their money themselves.
Sunday, March 4, 2012
Colorful Chalkboards
I make these mostly as gifts. A couple of them were seen lately which turned into requests to purchase. I thought I'd offer them here as well.
 I make the chalkboard paint myself so I can offer it in almost any color (black is boring and white seems kind of silly). You may also choose the wood you would like. It comes ready to hang on the wall.
Please email (billsias(at)comcast(dot)net) for price and delivery.

Please email (billsias(at)comcast(dot)net) for price and delivery.
Saturday, March 3, 2012
Plane pictures as requested.

Stanley 4 1/2
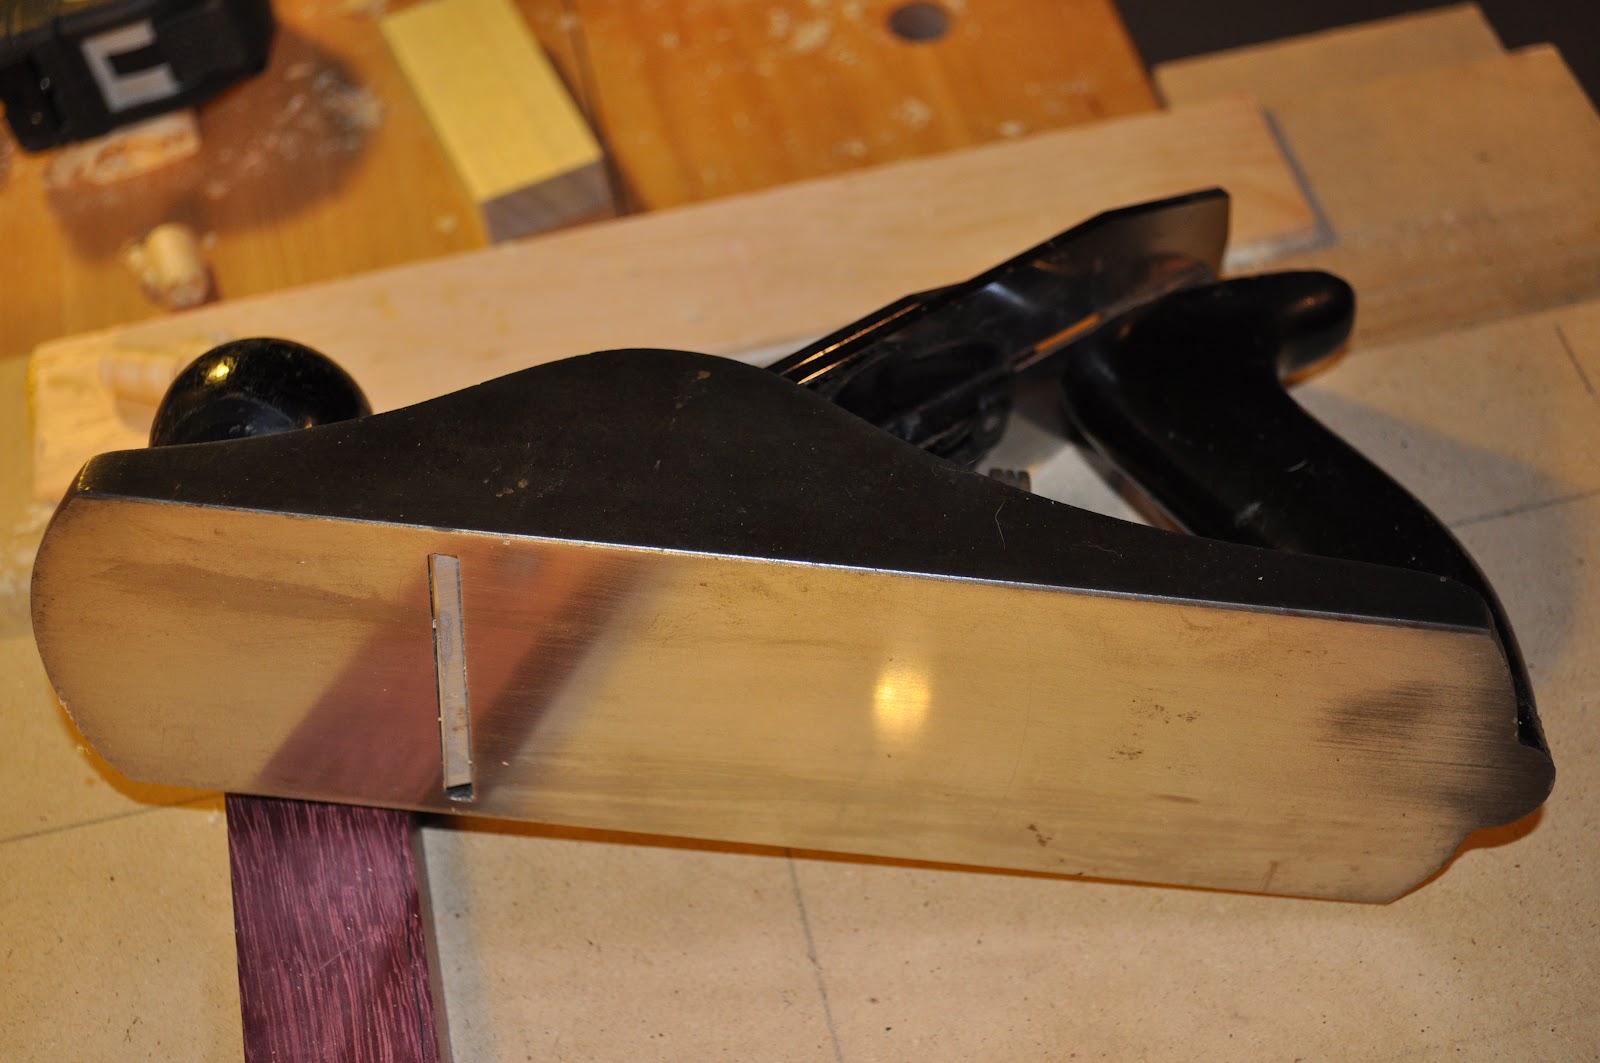
I flattened the sole. You will see a bit of unpolished area at the heel and a tiny strip at the toe. Other than that it is dead flat.

It has the large adjuster.

The iron and cap iron are IBC Ron Cosman replacements. They are extra thick and required opening the mouth a bit.

Stanley #8

I have done nothing to this plane, yet its in very good shape.

The original iron and cap iron are in it. I doubt it ever touched wood before I got it.

Stanley 386 fence. Here its attached to my #605C.

All the way in. Seems to be 45 degrees, I didn't measure it.
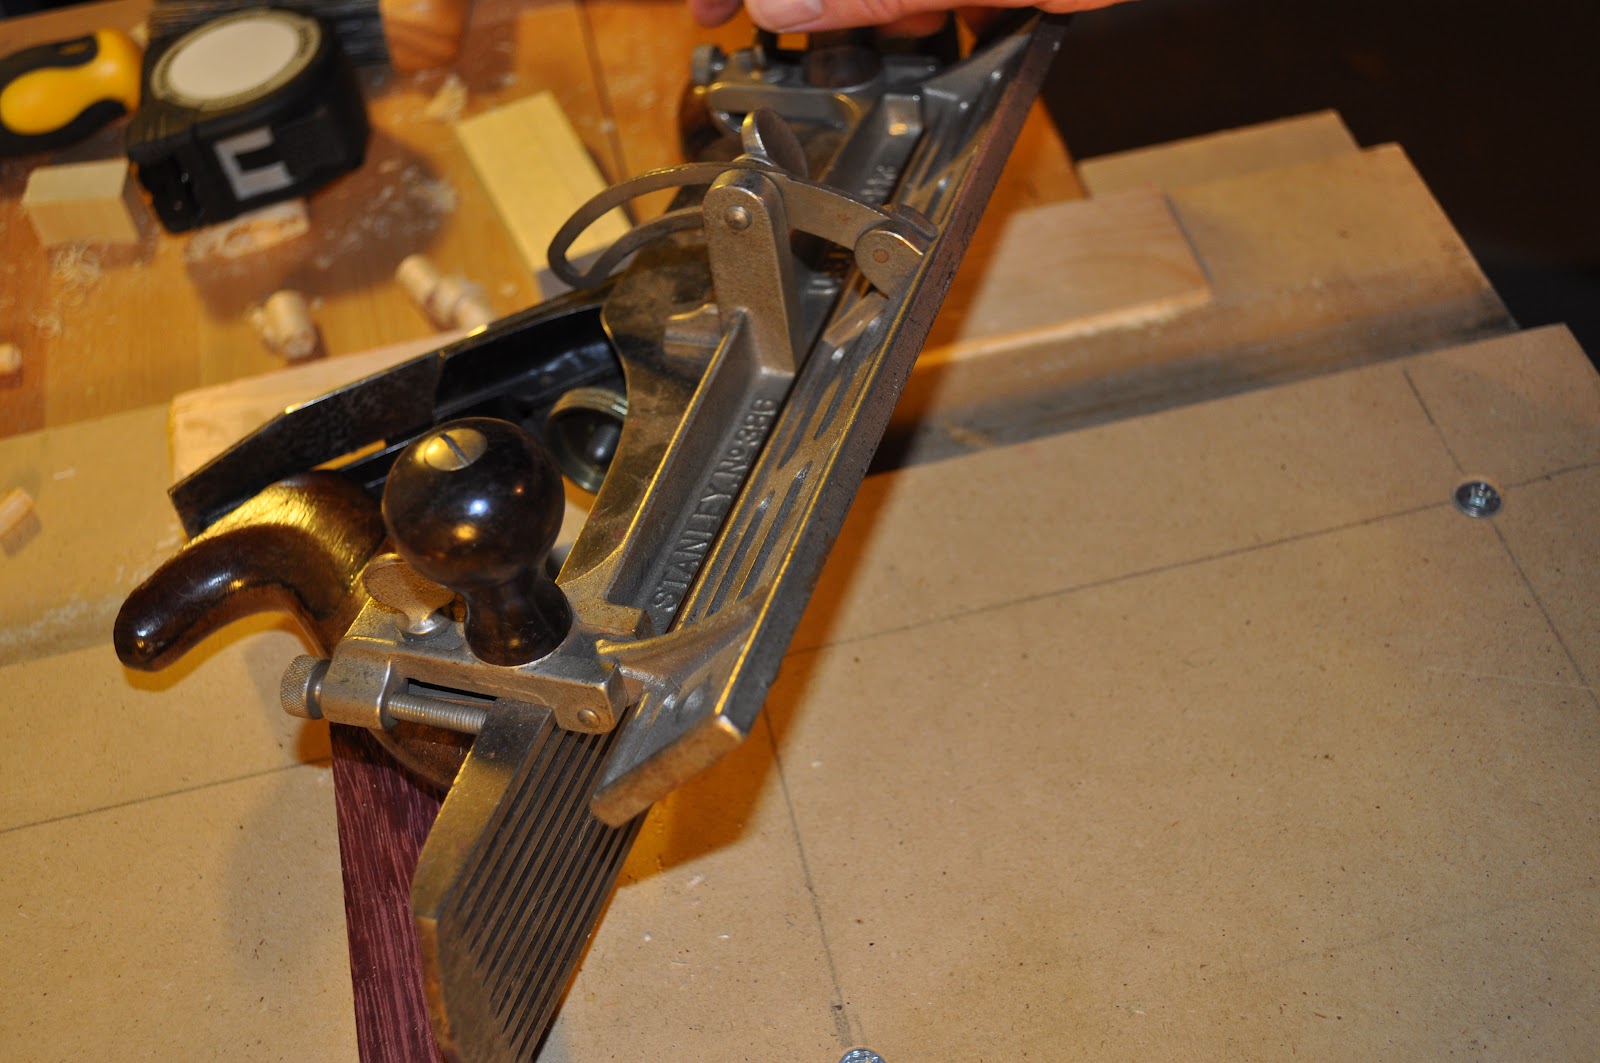
All the way out. Looks like 45 from 90 in this direction too, I didn't measure this either.

All by itself.
Subscribe to:
Posts (Atom)